Cook N Bake British Series: St Clement’s Pie

Rometti Limoncello Cook N Bake British Series St Clement's Pie

Like every full meal ends with some sweets, we couldn’t bring this Cook N Back British Series to an end without serving dessert!
Named after an English nursery rhyme’s, St Clemtent’s Pie is a citrusy delight that you may want to indulge into with a hot cup of tea.
Although the original recipe lists among the ingredients zest and juice of 3 lemons and 2 oranges, we would recommend to use either Rometti Limoncello or Rometti Arancello to taste in alternative to one of the two ingredients for an “adult”, citrusy version of this delicious pie!

Ingredients:
For the crust
250g light digestive biscuits
100g cornflakes
85g butter, melted
140g caster sugar

For the filling
1 large egg, plus 4 large egg yolks
397g can light condensed milk
zest and juice 3 lemons (or Rometti Limoncello to taste)
zest and juice 2 oranges (or Rometti Arancello to taste)
For the topping

150ml pot extra-thick double cream
100g 0% fat Greek yogurt
4 tbsp icing sugar
more lemon and orange zest, to decorate

Heat oven to 180C/160C fan/gas 4. Sit a fluted 20cm round loose-bottomed tin (about 5cm deep, or a slightly shallower 22cm tin) on a baking sheet. Break the biscuits into a big bowl, or double-bag them in food bags, and bash to big crumbs with the end of a rolling pin or small saucepan. Add the cornflakes and bash a bit more to crumbs. Mix with the melted butter and sugar and press into the base and sides of the tin. Bake for 15 mins, then remove and reduce oven temperature to 160C/140C fan/gas 3.
Whisk egg and yolks in a big bowl until pale and frothy. Whisk in the condensed milk, followed by the zests and juices. Pour in the tin and bake for 20 mins. Cool in the tin, then chill for at least 5 hrs, or overnight.
Whip the cream, yogurt and icing sugar together. Dollop on the pie and scatter with zest to serve.

~Enjoy!

Image and recipe from http://www.bbcgoodfood.com

Cook N Bake British Series: Toad in the Hole

Rometti Limoncello Cook N Bake British Series Toad in the Hole

If Yorkshire pudding is a pretty popular dish in the English cuisine, one of its variations has become nothing less: Toad in the Hole. Regardless of the unusual name, Toad in the Hole is internationally well-known, thanks also to Charles Elme Francatelli, an Anglo-Italian cook who talks about it for the first time in one of his recipe books dated from 1861.

For those of you out there who are curious about etymology of words, “toad” seems to refer to amphibians, in particular to frogs, as it resembles a toad sticking out his neck from the batter. As many other dishes though, even the origins of Toad in the Hole seems to be uncertain: it might have been existed already in 1757 when a Georgian shopkeeper noted on his diary of “sausages baked in batter pudding”.

Toad in the Hole is a great way of re-using meat leftovers, or some cheap meat worth to mix with a very humble pudding, in order to give it flavor, texture and protein.

The recipe below is Jamie Oliver’s version of a very simple yet outstanding English dish which could not go unnoticed for our Cook N Bake blog.

Ingredients:
sunflower oil
8 large quality sausages (or leftovers)
4 sprigs fresh rosemary
2 large red onions, peeled and sliced
2 cloves garlic, peeled and finely sliced
2 knobs butter
6 tablespoons balsamic vinegar
1 level tablespoon organic vegetable stock powder, or 1 vegetable stock cube

For the batter
285 ml milk
115 g plain flour
1 pinch salt
3 free-range eggs

Mix the batter ingredients together, and put to one side. I like the batter to go huge so the key thing is to have an appropriately-sized baking tin – the thinner the better – as we need to get the oil smoking hot.

Put 1cm/just under ½ inch of sunflower oil into a baking tin, then place this on the middle shelf of your oven at its highest setting (240–250ºC/475ºF/gas 9). Place a larger tray underneath it to catch any oil that overflows from the tin while cooking. When the oil is very hot, add your sausages. Keep your eye on them and allow them to colour until lightly golden.

At this point, take the tin out of the oven, being very careful, and pour your batter over the sausages. Throw a couple of sprigs of rosemary into the batter. It will bubble and possibly even spit a little, so carefully put the tin back in the oven, and close the door. Don’t open it for at least 20 minutes, as Yorkshire puddings can be a bit temperamental when rising. Remove from the oven when golden and crisp.

For the onion gravy, simply fry off your onions and garlic in the butter on a medium heat for about 5 minutes until they go sweet and translucent. You could add a little thyme or rosemary if you like. Add the balsamic vinegar and allow it to cook down by half. At this point, I do cheat a little and add a stock cube or powder. You can get some good ones in the supermarkets now that aren’t full of rubbish. Sprinkle this in and add a little water. Allow to simmer and you’ll have a really tasty onion gravy. Serve at the table with your Toad in the Hole, mashed potatoes, greens and baked beans or maybe a green salad if you’re feeling a little guilty!

~Enjoy! (and if you go to Jamie Oliver’s website you can also see the nutritional values of this flavorfully rich dish)

Image and recipe by Jamie OliverL http://www.jamieoliver.com/recipes/pork-recipes/toad-in-the-hole

Cook N Bake British Series: Beef Wellington

Rometti Limoncello Cook N Bake British Series Beef WEllington

If you are one of those people that love to learn the history of a dish, you will find particularly interesting this week’s dish: Beef Wellington, one of the most known English culinary trademarks.
Wrapped in puff party, Beef Wellington is nothing less than a baked tenderloin coated with pate’ and duxelles, sometimes with the addition of spices.

The name of Wellington seems to be linked to the 1st Duke of Wellington, Arthur Wellesley, who seemed to love beef, wine, pate’ and mushrooms. It’s also possible that more than a connection to his love for food, the dish was named Wellington because it was shaped like a military boot that the Duke used to wear. However like it often happens with drinks and dishes that became so popular that anyone wanted to claim their origin, there are other theories of how it generated, such as a variation of the French filet de boeuf in croute adapted for the English, or the use of this dish for parties and receptions in New Zealand. All of the mystery, of course, just contributes to increase the curiosity and appreciation of this dish.

Beef Wellington is not so easy to make, the tenderloin needs to be rare-roasted and before baking it needs to be coated with pate’ and duxelles. It’s better to bake it whole in order to retain most of the juice, but if preferred it can be sliced prior to baking and cook in individual portions.

If you like your tenderloin with lots of flavor, curry, ginger, allspice can be added to Beef Wellington.

Ingredients:

a good beef fillet (preferably Aberdeen Angus) of around 1kg/2lb 4oz
3 tbsp olive oil
250g/ 9oz chestnut mushroom, include some wild ones if you like
50g/ 2oz butter
1 large sprig fresh thyme
100ml/ 3½ fl oz dry white wine
12 slices prosciutto
500g/1lb 2oz pack puff pastry, thawed if frozen
a little flour, for dusting
2 egg yolks beaten with 1 tsp water

Heat oven to 220C/fan 200C/gas 7. Sit the 1kg beef fillet on a roasting tray, brush with 1 tbsp olive oil and season with pepper, then roast for 15 mins for medium-rare or 20 mins for medium. When the beef is cooked to your liking, remove from the oven to cool, then chill in the fridge for about 20 mins.
While the beef is cooling, chop 250g chestnut (and wild, if you like) mushrooms as finely as possible so they have the texture of coarse breadcrumbs. You can use a food processor to do this, but make sure you pulse-chop the mushrooms so they don’t become a slurry.
Heat 2 tbsp of the olive oil and 50g butter in a large pan and fry the mushrooms on a medium heat, with 1 large sprig fresh thyme, for about 10 mins stirring often, until you have a softened mixture. Season the mushroom mixture, pour over 100ml dry white wine and cook for about 10 mins until all the wine has been absorbed. The mixture should hold its shape when stirred. Remove the mushroom duxelle from the pan to cool and discard the thyme.
Overlap two pieces of cling film over a large chopping board. Lay 12 slices prosciutto on the cling film, slightly overlapping, in a double row. Spread half the duxelles over the prosciutto, then sit the fillet on it and spread the remaining duxelles over. Use the cling film’s edges to draw the prosciutto around the fillet, then roll it into a sausage shape, twisting the ends of cling film to tighten it as you go. Chill the fillet while you roll out the pastry.
Dust your work surface with a little flour. Roll out a third of the 500g pack of puff pastry to a 18 x 30cm strip and place on a non-stick baking sheet. Roll out the remainder of the 500g pack of puff pastry to about 28 x 36cm. Unravel the fillet from the cling film and sit it in the centre of the smaller strip of pastry. Beat the 2 egg yolks with 1 tsp water and brush the pastry’s edges, and the top and sides of the wrapped fillet. Using a rolling pin, carefully lift and drape the larger piece of pastry over the fillet, pressing well into the sides. Trim the joins to about a 4cm rim. Seal the rim with the edge of a fork or spoon handle. Glaze all over with more egg yolk and, using the back of a knife, mark the beef Wellington with long diagonal lines taking care not to cut into the pastry. Chill for at least 30 mins and up to 24 hrs.
Heat oven to 200C/fan 180C/gas 6. Brush the Wellington with a little more egg yolk and cook until golden and crisp – 20-25 mins for medium-rare beef, 30 mins for medium. Allow to stand for 10 mins before serving in thick slices.

~Enjoy!

Image © Tim Winter
Recipe from Good Food Magazine, Dec. 2004

Cook N Bake British Series: Fish and Chips

Rometti Limoncello Cook N Bake British Series Fish and Chips

Food – any type of food!..seems to taste better eaten in good company or savored outdoors.  Being Italian, I love meals with family  gathered around the diningroom table, however I remember (with a little nostalgia) those cold winter afternoons on my way back home from school.  Walking past bundled up street vendors that would sell you crackling castagne, chestnuts, in a newspaper cone. There’s just nothing quite like the taste of freshly roasted chestnuts on a cold afternoon walking through Milan no less!

Similarly, the dish that we are going to talk about this week, shared a similar humble beginning once served in urban streets in newspapers, and later  became an iconic British dish that restaurants all around the world that try to replicate the light yet flavorful, crispiness of Fish and Chips!

Charles Dickens is one of the first writers to mention the existence of a “fried fish warehouse” in his masterpiece Oliver Twist, which makes us think that fish and chips must go back to at least the 19th century. If we want to pin down the year of the very first fish and chips shops opening, records tell us that it is attributed to Joseph Malin in 1860 in London. It is during that time in fact that Great Britain started developing railways to facilitate transportation of material and food, including fish from the North Sea. If we still have this dish today it’s because Fish and Chips is one of the truly traditional British dishes that survived the World War II when rationing affected most of the culinary traditions.

The secret to make a very good Fish and Chips is to use a batter made of flour, water and a little bit of baking soda which adds that beautiful golden color once fried  Beer and milk batter can also substitute water: if beer is preferred you can decide whether to use a lager or a bitter beer which will also change the color from golden to an orange-brown.

Frying can be done with beef dripping or lard, or vegetable oil.

Although in the United States Fish and Chips is usually served with coleslaw, ketchup and tartar sauce, the original British dish is served with salt, pepper and a few drizzles of vinegar. Instead of coleslaw, mushy peas are often served aside.

If you are in London, we recommend making a stop a the Sea Shell restaurant, where fish and chips has been one of the main popular dishes for over 40 years. But if, like us, you live in LA and the surrounding areas, we suggest you check out the Fat Cow at the Grove, owned by Chef Gordon Ramsey. Here Fish and Chips is served traditional-style in a casual, modernly rustic and welcoming environment.  If your feelin fancy , we recommend another Chef Ramsey’s restaurant, the London West Hollywood Hotel. The London After Five bar menu offers a California-style reinterpreted fish and chips served with tartar sauce and English pea puree.

Ingredients: (serves 4)

sunflower oil, for deep-frying
½ teaspoon sea salt
1 teaspoon freshly ground black pepper
225 g white fish fillets, from sustainable sources, pinboned, ask your fishmonger
225 g flour, plus extra for dusting
285 ml beer, cold
3 heaped teaspoons baking powder
900 g potatoes, peeled and sliced into chips
For the mushy peas
1 knob butter
4 handfuls podded peas
1 small handful fresh mint, leaves picked and chopped
1 squeeze lemon juice
sea salt
freshly ground black pepper

To make your mushy peas, put the butter in a pan with the peas and the chopped mint. Put a lid on top and simmer for about 10 minutes. Add a squeeze of lemon juice and season with salt and pepper. You can either mush the peas up in a food processor, or you can mash them by hand until they are stodgy, thick and perfect for dipping your fish into. Keep them warm while you cook your fish and chips.

Pour the sunflower oil into your deep fat fryer or a large frying pan and heat it to 190ºC/375ºF. Mix the salt and pepper together and season the fish fillets on both sides. This will help to remove any excess water, making the fish really meaty. Whisk the flour, beer and baking powder together until nice and shiny. The texture should be like semi-whipped double cream (i.e. it should stick to whatever you’re coating). Dust each fish fillet in a little of the extra flour, then dip into the batter and allow any excess to drip off. Holding one end, lower the fish into the oil one by one, carefully so you don’t get splashed – it will depend on the size of your fryer how many fish you can do at once. Cook for 4 minutes or so, until the batter is golden and crisp.

Meanwhile, parboil your chips in salted boiling water for about 4 or 5 minutes until softened but still retaining their shape, then drain them in a colander and leave to steam completely dry. When all the moisture has disappeared, fry them in the oil that the fish were cooked in at 180ºC/350ºF until golden and crisp. While the chips are frying, you can place the fish on a baking tray and put them in the oven for a few minutes at 180ºC/350ºF/gas 4 to finish cooking. This way they will stay crisp while you finish off the chips. When they are done, drain them on kitchen paper, season with salt, and serve with the fish and mushy peas.

Enjoy!~

Recipe by Jamie Oliver 

Image © Morgans, Gareth

Cook N Bake British Series: Welsh Cawl

Rometti Limoncello Cook N bake British Series Welsh Cawl

Welcome back to our weekly blog, folks!

After our brief trip to Turkey we move now a little norther, because the protagonist of this month’s Cook N Bake is the British cuisine. Yes, my dear reader, you heard me right. Regardless of its bad reputation, we decided that there must be at least five dishes that are worth listing and experimenting, so here we go!
First of all, let’s try to understand this unusual cuisine: the rich history of the United Kingdom is in grand part the reason why it seems like British cuisine is more of a cultural mix than a defined tradition. Welsh, Scottish and English dishes are indeed greatly influenced by local ingredients; in addition throughout history Celts, Anglo-Saxons and later on Indians (following the Middle Ages when Britain became a pivot for the maritime spice trade) have affected the cuisine with both flavors and techniques. But that does not explain still why British food is bad.
Back in the day, during the Edwardian England (if you watched Downton Abbey you know what I am talking about!), food was the art of skilled chefs who enjoyed going above and beyond also with the utilization of new pots and molds. The upper and middle classes were the hot pit of such a sophisticated cuisine. With the beginning of industrialization, and World War I, the upper and middle class started losing their power and influence, and industrial foods started to replace the traditional ones.
Rationing, thought to be a prevention against food shortages, became a great limitation for the British cuisine. Long story short: British traditional, sophisticated dishes were lost forever and even after the war British cuisine never completely recovered.

There are some dishes, however, that survived the two World Wars and can be considered traditional British dishes. Among them, the Welsh Cawl. Cawl is a traditional Welsh soup, typical of the Winter season, made with salted bacon (or beef, today lamb seems to have substituted it), potatoes, carrots , leeks and a choice of seasonal vegetables. Served with bread and cheese if desired.

Ingredients:
2-3 lb. Welsh lamb best end of neck cutlets
1 large sliced onion
3 leeks
2 medium sliced carrots
1 medium parsnip
1 small swede turnip or 2 white turnips
2 tablespoons chopped parsley
6 small potatoes
salt and pepper
4 pints (8 cups) water
If in season cabbage, celery, etc., can all be used

Trim the meat of fat so far as possible, cover with cold water, add salt and pepper, bring to the boil, and simmer slowly for 1 hour, then leave it to get cold and skim off all the fat. Put in all the vegetables except 1 leek, the potatoes and half the parsley, cover and simmer very slowly for 1 hour, then add the potatoes cut in half and continue cooking for 20 minutes. Then add the remainder of the parsley, taste for seasoning and finely chop the remaining leek (green and white part) on top. Let it cook for not more than 5 minutes and serve. Some families treat it as a French pot-au-feu – that is, they serve the clear broth first, then the meat and vegetables as a second course. Traditionally Cawl was eaten in wooden bowls with wooden spoons so that there was no fear of burning the mouth. Serves 4-6.

~Enjoy!

Recipe from http://www.welshholidaycottages.com

Cook N Bake Turkish Series: Sutlac Dessert

Rometti Limoncello Cook N Bake Turkish Series Sutlac Dessert

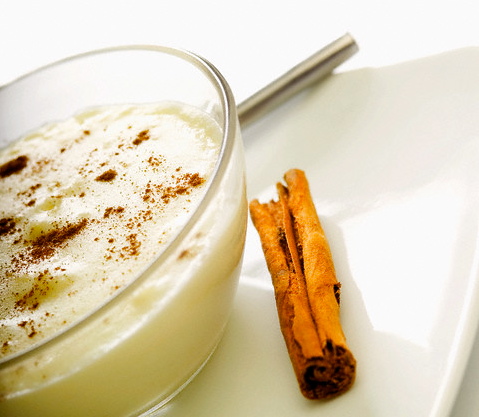
It’s Thursday again, and hopefully after four delicious Turkish recipes you still have room for some dessert! For one last time during this Turkish Series, my friend Ceren from Istanbul suggested Sutlac Dessert, nothing less than rice pudding with a hint of vanilla and cinnamon. The very first bite of it will awaken your childhood memories, the sweet smell of vanilla and cinnamon will bring you back to those after school afternoon filled with homework when either mom or grandma would cheer you up with a chilled, creamy rice pudding.
One of the favorite Ottoman desserts, which at the time was usually flavored with rose-water, Sutlac Dessert is still a very popular home made dish, as well as a dessert you can often find on restaurant menus.

On the note of such a simple yet ethereal treat, we must now say goodbye to our Turkish Series. We hope you enjoyed it and stay tuned for more recipes from around the world to come!
Ingredients:
1 liter of milk (plus an extra 1/2 cup for mixing the starch)
1/2 a cup of rice
1 cup of sugar
1 tablespoon of starch
1/2 a package of vanilla
1 teaspoon of cinnamon
Clean the rice and boil slowly in 1 cup of water. Add milk and boil for 10 more minutes. Add sugar and stir until it dissolves.
Mix the starch with half a cup of milk ad then add it into the rest of the milk and rice mixture. Bring to a boil then remove from heat and add in vanilla. Cover and let sit for 10 minutes.
Pour into serving bowls while it is still warm. Sprinkle cinnamon on top once it has cooled.
Note: if desired make sutlac in the oven during directions 1-3
if desired mix starch with 2 eggs and 1 cup of milk before adding it to the milk and rice mixture.then add in vanilla.
If desired put the pudding into oven safe bowls and set on a tray with water in it then put bowls in the oven,and use overhead heat to toast the tops of the pudding.

~Enjoy!

Cook N Bake Turkish Series: Sehriyeli Pilav

Rometti LImoncello Cook N Bake Series Rometti Limoncello  - Cook N Bake Turkish Series -  Sehriyeli Pilav

It can be boiled or steamed, with small and round or long, thin grain, and it surely is one of the most predominant ingredients in either western and eastern cuisines. So versatile to form compact breaded balls, yet again light and airy, sometimes crispy. This week’s dish is a manifesto of Turkish cuisine’s rice dishes, Sehriyeli Pilav, also known as Pilaf with Orzo.
In Turkish, pilaf means “lump of boiled rice”, although pilaf does not alway refer to dishes made with rice but also with other grains. As a matter of fact we often hear the word bulgur associated to pilaf: bulgur is a type of rice made from gluten-free wheat. Cous cous and cracked wheat can also make pilaf.
Born as a ceremonial dish, pilaf used to be served in Ottoman cerimonies with soups, dolma, meat, vegetables and sweets. A Turkish tradition is to serve a dish of pilaf, called sözkesen, at the end of the meal to indicate the meal completion.
Whether it is served with vegetables, seafood, meatballs, pistachios or dried fruit, pilaf is made with rice soaked in water, drained and fired in oil, water and salt. After the cooking it needs to rest for about 20 minutes, and then accompanied by meat, poultry, vegetables, or orzo. While the condiment is what determines the flavor of the dish, a good pilaf must have a good quality rice, which should not absorb too much water and the grains should not stick together.
Sehriyeli Pilav is a great source of protein to complete your meal, you can prepare it for a succulent Sunday meal or serve it as a complete, nutrient dinner on a weekly night. And if you make a little too much, don’t worry, it’ll taste even more flavorful the day after!

Ingredients:
2/3 cup orzo
1/2 cup long-grain white rice
1 medium onion finely chopped
2 carrots 1/4 inch dice
2 ribs of celery 1/4 inch dice
2 garlic cloves finely chopped
1 cup water
1 3/4 cups chicken broth
1/4 cup chopped fresh italian parsley
1 tablespoon olive oil
1 tablespoon unsalted real butter
1/4 teaspoon salt or more to taste
1/4 teaspoon pepper or to taste
1 small zucchini if desired, 1/4 inch dice (1 1/4 cups)
1/4 cup slivered almonds toasted

Chop the onions, carrots, celery and garlic, parsley and zucchini if desired.
Heat the oil and butter in the skillet over medium heat, then saute the orzo, stirring it constantly until it is golden brown about one minute. Add the prepared vegetables (except the parsley and zucchini) and add the salt and pepper. Stir until the onion is lightly browned, then add the rice, saute and stir until coated with oil and butter.
Add the broth and the water and bring to a boil, lower the heat to low and cook covered, until liquid is absorbed, about 15 to 20 minutes. Avoid removing the lid and letting the steam escape. Remove from heat and quickly stir in the zucchini, and let it stand 5 minutes. Zucchini will steam. Then stir in the parsley and serve sprinkled with toasted almonds. Enjoy!

Recipe from http://www.justapinch.com
Image © Fénot

Cook N Bake Turkish Series: Doner Kebab

Rometti Limoncello Cook N Bake Turkish Cuisine Doner Kebab

As we already mentioned, vegetables are probably the most common base ingredient in Turkish cuisine. This week, however, we couldn’t ignore the most known turkish dish all around the world: Kebab.

Kebabs are made with casserole meat, stews or even grilled meat. Doner Kebab (“rotating roast“) is extremely popular throughout Europe, but also in some areas of the United States, both as a dine-in dish and, especially, as a take away. It is not uncommon that Doner Kebab is called shawarma, a word originated from the Turkish çevirme which is simply a synonym of doner. A mixture of veal, beef and lamp, Kebab is cooked on a vertical spit and shaved into thin shavings. It is then wrapped in a either a flatbread or a sandwich. Sometimes it can be also served on a plate together with lettuce, tomato, onion and cucumber.

Kebab seems to have originated in the 18th century during the Ottoman empire, however back then the spit, called doner, was not vertical but horizontal. The vertical mangal,” barbecue”, according to tradition, is attributed to Hacı İskender, who owned a restaurant in the industrial 19th century Bursa, Turkey, and invented the way of roast vertically as his grandson İskender Efendi states in one of the family biography.
Doner Kebab is not a very easy dish to make at home, however the homemade version is almost as tasty and good as the one made on a vertical slit!

Ingredients:
1 (2 1/2- 3 pound) Lamb Leg (boned & cut in slices)
3 pounds Ground Lamb
3 cups minced Onions
1 large Tomato
1 Egg
1 tbsp Black Pepper Powder
Salt (to taste)
Lamb Fat
1 cup Olive Oil

Remove any bits of skin and bone from the lamb leg. Cut it into serving-size slices, about 1/4 to 1/2 inch thick. Pound it with a meat tenderizer or the edge of a heavy saucepan until thin and trim.

Prepare a marinade sauce with onions, olive oil, salt and pepper, and soak the meat in this marinade overnight.

Spread the lamb fat over each piece of the meat, and ground lamb mixed with an egg. Thread pieces of meat on a long skewer, starting with the larger pieces. Trim the chunk of meat on the skewer and add trimmings to the end of the skewer. The tomato is put on the skewer whole at the end.

If you have a Doner Kebab broiler you can let the meat cook while turning and shave it as you go. But if you don’t you can still shape the minced lamb into a loaf tin and cook it on a baking tray  at 356 F for about 1 hour and 20 min, turing it halfway through. When it is done wrap it in aluminum foil and let it rest for about 10 min. Slice it as thin as possible and serve with lettuce, onions, tomato and cucumber, chili if you like, over a pita bread or on a plate.

~Enjoy!

Cook N Bake Turkish Series: Stuffed Zucchini

Rometti Limoncello Cook N Bake Turkish Series Stuffed Zucchini

Welcome back to our weekly Cook N Bake Turkish Series!

This week we have a special recipe coming from a special friend of mine who lives in Istanbul. I’ve known Ceren for a few years now, she is one of those people who I will always consider a friend although although I could go years without seeing her. So of course, when we here at Rometti decided to dedicate five weeks to Turkish cuisine, I couldn’t help but thinking of her and she promptly emailed me one of her mom’s favorite recipes: Turkish Stuffed Zucchini.

Istanbul was the center of the Ottoman cuisine. Being the capital, chefs would be called to the imperial court to represent their local cuisine, test it and amalgamate it. Turkish cuisine was not important only for the empire, but for all people as well. As a matter of fact during the month of Ramadan there would be households open to all neighbors to stop by and grab a bite.

Stuffed vegetables are typical of Turkish cuisine: they are commonly called dolma. Rice is often the main ingredient for the stuffing, together with the part of the vegetable that was carved out, and spices. Vegetables are a dominant ingredient compared to meat, which is often served in smaller portions or is used for flavoring.
Turkish cuisine is very simple, and doesn’t use a lot of saturated fats. As a matter of fact olive oil is usually the main oil used for cooking, together with sunflower oil, canola oil, corn oil, sesame oil and walnut oil.

Even if you are not a fan of vegetables you won’t be able to say no to this appetizing, flavorful dish that all moms love to make in Turkey! Your children will love it too!
Ingredients:

2 lb zucchini
1½ cups rice
1 medium onion, chopped finely
½ cup parsley, chopped
1 Tbsp dried mint
1 tsp salt to taste
½ tsp black pepper
1/3 cup olive oil
1 Tbsp tomato paste
2-3 tomatoes, sliced (for covering tops)
Hot water

Wash and drain the rice. Chop the onions finely and mix all the ingredients but hot water and the zucchini. Wash the zucchini and make scratches or parallel marks with a fork, or you may peel them in stripes. Cut the stems. If the zucchini are too long cut them in half, then scrape inside of each piece of zucchini using a small spoon, making them hollow. You may sprinkle with salt inside.
Stuff each hollow zucchini with the rice stuffing, leaving about ¼ inch part on top. Cover each stuffed zucchini either with a slice of tomato or stems of the zucchini. Place them in a pot leaving no room in between. Add about 1 inch of hot water to cover the zucchini and cook over medium-low heat for about 30 minutes or until the rice is cooked. Take them over serving plate and serve with either plain or garlic yogurt. You may garnish with dill.

~Enjoy!

Recipe courtesy of Ceren Ates.

Cook N Bake Turkish Series: Tarhana Soup

Rometti Limoncello Cook N Bake Turkish Series Tarhana Soup

Bordered by eight countries (Bulgaria, Greece, Georgia, Armenia, Iran, Azebaijani, Iraq and Syria), and three different seas (Mediterranean, Aegean, Black, plus the the Sea of Maramara, the Bosphorus and Dardanelles), there is an enchanting land that combines both modern and old world features: Turkey.
Influenced by both Greco-Roman and Islamic cultures, Turkey is a mix of Anatolian, Ottoman and Wester countries traditions which transfer also in their cuisine. Starting this week our new Cook N Bake: Turkish Series will present us some delicious dishes that are the result of a fusion between Ottoman, Middle Eastern, Balkan and Central Asian cuisines.

Although Turkish cuisine changes from North to South and East to West, there are some ingredients that are commong throughout the country: beef, chicken, fish, onion, garlic, lentils, beans, tomatoes, nuts such as pistachios and almonds, parsley, cumin, paprika, thyme and oregano together with many other spices. Fruit is also popular, other than being cheap, both dried and fresh. Yogurt is also extremely present in the Turkish cuisine.
Usually a Turkish meal starts with a soup (çorba), which is also the main dish during the fasting of the month of Ramadan, thus we want to start our Turkish Series with a soup as a first course: Tarhana Soup.

Tarhana Soup gets its name to the powder used to make this soup which is very popular in Anatolia. The powder has a light, pink color and a sour taste. Its color is due to the ingredients used to make this powder obtained by crumbling a fermented mix made of plain yogurt, flour, red pepper vegetables, tomatoes and onions. Eventually the powder is boiled with water, milk, spices and butter.

Tarhana Soup is nutritious, healthy and can even be perfect as a hot, warming breakfast when it’s rainy and cold outside!

Ingredients:

2-3 tablespoonful tarhana dough (see below)
1/2 cup water
2 tbsp crushed tomato
2-3 cup chicken stock
Crushed red pepper, optional
1 tsp butter
Crumbled Feta cheese to furnish
Place the tarhana and 1/2 cup water in a pot. Leave it alone for 1-2 hours for tarhana to dissolve a bit. Then add in the rest of the ingredients. Cook and stir constantly over medium-low heat. Adjust consistency of the soup to your liking by adding more water if you prefer. Taste for salt.

Place the soup into a bowl, sprinkle some crumbled feta cheese on top and serve while still warm.

~Enjoy!